Do you like to craft or take on projects? Cleaning and staying organized can be the worst part of starting a new craft or project. We have some tips on how to keep your work station clean and organized while completing your latest creation. This can make the project less overwhelming and a more enjoyable experience. You can learn more at apartment therapy.
Start with a clean surface.
Every project will have different requirements. You might need a small table for a quick paper project, or an enormous area to layout quilt pieces — either way it's a good idea to clear off your surface and wipe it down before getting out your supplies. It only takes a minute and ensures you won't set your materials down in a puddle from your water glass, breakfast crumbs, stray threads, or any of the dozens of household perils for craft supplies.
Gather all of your materials and tools before beginning your project.
This is a common cooking tip that applies to crafting as well. By gathering everything together you're checking to be sure you have all of the necessary supplies, and preventing mess-making mid-craft mad shuffles through the bins, baskets, closets and drawers that house your supplies. Now, I will not be so obnoxious as to say that having all of your supplies stored in an organized manner is a tip for staying organized while crafting, but I will say that if the ribbon you need is tucked in a drawer with other ribbons instead of tangled around eight half-wound skeins of yarn studded with hazardous fabric shears and knitting needles, it will be easier to get started on the right foot.
Corral small items.
Anything tiny that comes in multiples should be corralled into bowls or other small containers. Things like beads, sequins, scrapbook eyelets, and screws have a tendency to roll off everywhere and then be impossible to find. I occasionally realize I must have dropped some beads when I hear my vacuum struggling near my project table. Of course, I feel I have to mention glitter. By all means corral it in a container of some kind, but if you're working with glitter my best advice is to learn to love glitter, because you will be living with it until the end of time. I have been married three and a half years and I still find glitter from the place cards at my wedding, and I've moved twice since then!
Place a scrap receptacle right at your feet.
Any sort of basket or bin to drop scraps into as you go will help keep things tidy. I like to put all of my sewing or paper scraps into my bin while I'm crafting, then go through at the end to see if I have any scraps large enough to keep. If you're working with glue, paint, or other messy/sticky items, it's a good idea to have an actual trash can nearby to throw away anything that can't be salvaged.
Clean up immediately upon finishing your project.
This is where I get into trouble. It's important to immediately put away all of your leftover supplies and tools. That way everything is back where it belongs when you want to start your next project. It's amazing how cyclical organization is! Once everything is put away you can wipe down your surfaces again. If anything has spilled, or you've marked your surface, it will never be easier to clean than when it's fresh. You can even take care of a fair amount of the aforementioned glitter mess with a damp towel.
Following these tips should help you have a tidy crafting experience, and set you up to start your next fun project!
Tuesday, February 25, 2014
Monday, February 17, 2014
Comfort Food From Around the World
Posted by Club Pacifica on 10:48 AM
Do you enjoy comfort food? Here are some great recipes from around the world. Each of these recipes is considered a "comfort food" in their country. You can learn more at The Kitchn.
- TOP ROW
- 1 How to Make Fried Rice - China
- 2 Cuban Black Bean Soup - Cuba
- 3 Korean-Style Steamed Eggs - Korea
- 4 African Beef & Peanut Stew - The Congo and Ghana
- 5 Gluten-Free Dessert Recipe: Marking's Bibingka - The Philippines
- MIDDLE ROW
- 6 Vegetarian Pho (Vietnamese Noodle Soup) - Vietnam
- 7 Shepherd's Pie - Ireland
- 8 Lamb Korma - India
- 9 Authentic Spaghetti alla Carbonara - Italy
- 10 Slow-Cooked Boeuf Bourguignon - France
- BOTTOM ROW
- 11 Enchiladas Verdes - Mexico
- 12 How To Make Baklava - Greece
- 13 Sauerkraut, Potato & Cheese Pierogi - Poland
- 14 Thai Green Coconut Curry with Chicken and Zucchini - Thailand
- 15 Recipe: Salmon and Black Sesame Onigiri (Japanese Rice Balls) - Japan
Wednesday, February 12, 2014
DIY Valentine's Day Gifts
Posted by Club Pacifica on 8:34 AM
Are you looking for a gift for your special guy this Friday? These are
some great DIY gifts that will not break the bank. Keep reading and
you can learn more here.
1. DIY Sharpie Mug - For the always-working-late, coffee-obsessed guy
Want him to stay sharp in the morning? Make your own coffee mug by drawing or writing some personal messages on it with a Sharpie marker. It's an easy, tailored gift that he can actually use. You can buy your own mug and Sharpie or get a DIY mug gift package at Starbucks. Here's a YouTube tutorial:
2. DIY Skinny Tie - For the business-first, suit-up-like-Barney-Stinson guy
Ties are one of the top picks in terms of gifts for men, but instead
of spending hundreds of dollars on a nice tie, why not make one for him?
You can use any kind of fabric you want, just be creative. A guy can
never have too many ties--just as girls can never have too many shoes.
DIY MEN'S SKINNY TIE
3. DIY Meal - For the food-loving, on-a-budget guy
The first thing everyone thinks of when it comes to Valentine's Day is having a good meal at a nice restaurant, which is usually expensive. Instead, why not buy a couple of candles and placemats and cook him a meal instead? Dinner can be just as nice at home, especially if you cook his favorite dishes. Here's a link to some Valentine's Day recipes, but there are thousands of other ideas out there for making a special V-Day feast.
20 LOVEY DOVEY DINNERS
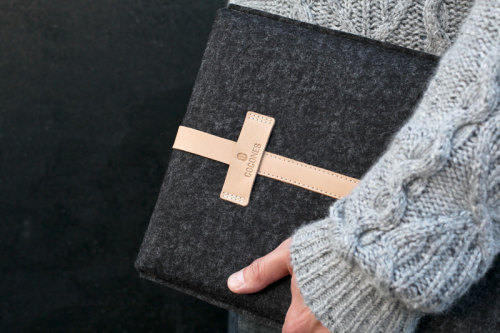
4. DIY Laptop/iPad Case - For the tech-savy, slightly hipster guy
Many people have Macbooks and iPads these days, but you can make his stand out with a personalized laptop or iPad sleeve. Be creative by adding things that only you two would understand. From leather to tweed cases, here are 20 simple tutorials on making a laptop or iPad sleeve just for you and yours.
20 DIY LAPTOP/IPAD SLEEV PROJECTS
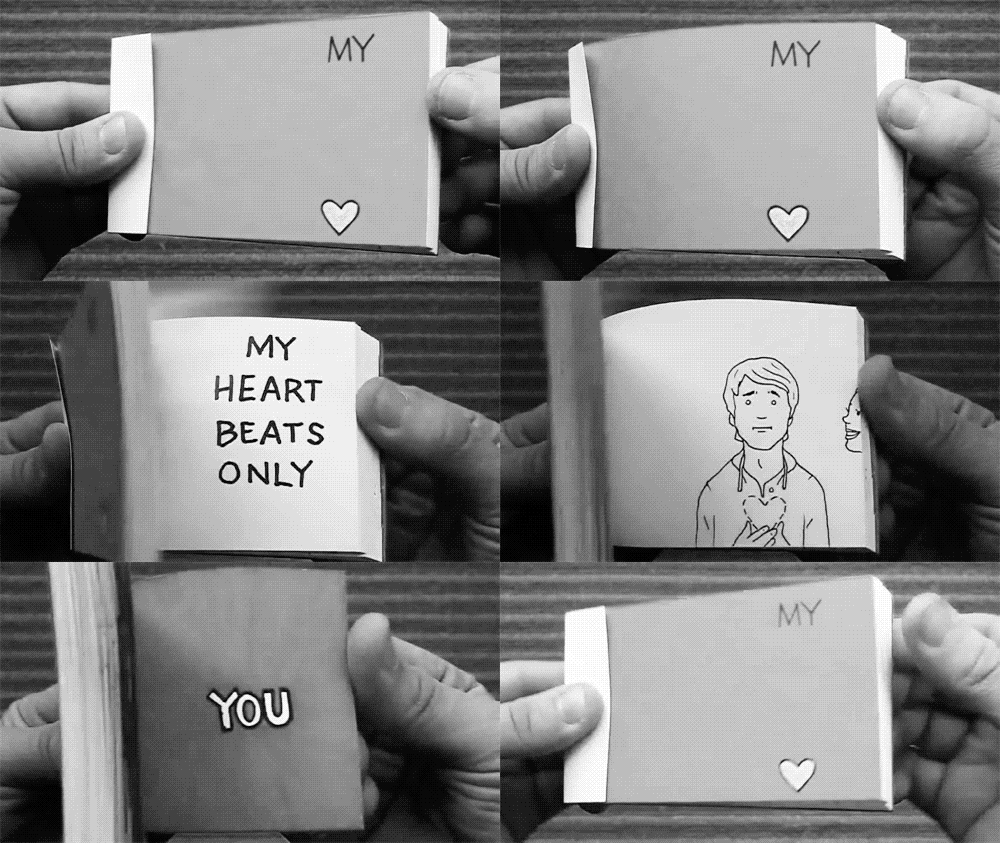
5. DIY Kiss Flip book - For the romantic, photo-loving guy
Whether he's a hopeless romantic or a down-to-earth practical kind of
guy, he will definitely appreciate this cute little idea. Between
Facebook, Twitter, Instagram and Vine, you can easily find photos and
videos of your other half, but this old-school method of stop-motion
will create a more touching action sequence than any app could. Here's
an easy tutorial on making a Kiss Flip book, which you can customize to
your liking.
1. DIY Sharpie Mug - For the always-working-late, coffee-obsessed guy
Want him to stay sharp in the morning? Make your own coffee mug by drawing or writing some personal messages on it with a Sharpie marker. It's an easy, tailored gift that he can actually use. You can buy your own mug and Sharpie or get a DIY mug gift package at Starbucks. Here's a YouTube tutorial:
2. DIY Skinny Tie - For the business-first, suit-up-like-Barney-Stinson guy
DIY MEN'S SKINNY TIE
3. DIY Meal - For the food-loving, on-a-budget guy
The first thing everyone thinks of when it comes to Valentine's Day is having a good meal at a nice restaurant, which is usually expensive. Instead, why not buy a couple of candles and placemats and cook him a meal instead? Dinner can be just as nice at home, especially if you cook his favorite dishes. Here's a link to some Valentine's Day recipes, but there are thousands of other ideas out there for making a special V-Day feast.
20 LOVEY DOVEY DINNERS
Many people have Macbooks and iPads these days, but you can make his stand out with a personalized laptop or iPad sleeve. Be creative by adding things that only you two would understand. From leather to tweed cases, here are 20 simple tutorials on making a laptop or iPad sleeve just for you and yours.
20 DIY LAPTOP/IPAD SLEEV PROJECTS
5. DIY Kiss Flip book - For the romantic, photo-loving guy
Tuesday, February 4, 2014
Side Dish from Your Childhood
Posted by Club Pacifica on 10:49 AM
Are you craving that familiar food from your childhood? You can have
grown up tater-tots that do not look like they come from a school
cafeteria? Here is a great recipe from The Kitchn.
4 tablespoons olive oil
2 cloves garlic, minced
Salt and freshly ground black pepper, to taste
Italian parsley, finely chopped
Preheat the oven to 350°F. Thoroughly scrub the potatoes and arrange them on a parchment-lined baking sheet. Bake for 20 minutes or until they are tender enough to pierce with a fork, but not browned. Let the potatoes rest for 10 minutes or until they are cool enough to handle.
Turn the oven up to 450°F. Using the bottom of a plate, a sturdy rocks glass, or measuring cup, smash the potatoes with firm, downward pressure. Squish each potato to about 3/4-inch thick. They will crack and split, but they should, for the most part, stay in one piece.
Brush or drizzle generously with olive oil, sprinkle with minced garlic, and place back in the oven. Bake until crispy and golden brown, about 15 minutes.
Sprinkle with salt, pepper, and parsley, and try not to eat the whole pan by yourself.
Grown Up Tater-Tots
Serves 2 to 3
1 pound small potatoes, like baby Yukon Golds or fingerlings4 tablespoons olive oil
2 cloves garlic, minced
Salt and freshly ground black pepper, to taste
Italian parsley, finely chopped
Preheat the oven to 350°F. Thoroughly scrub the potatoes and arrange them on a parchment-lined baking sheet. Bake for 20 minutes or until they are tender enough to pierce with a fork, but not browned. Let the potatoes rest for 10 minutes or until they are cool enough to handle.
Turn the oven up to 450°F. Using the bottom of a plate, a sturdy rocks glass, or measuring cup, smash the potatoes with firm, downward pressure. Squish each potato to about 3/4-inch thick. They will crack and split, but they should, for the most part, stay in one piece.
Brush or drizzle generously with olive oil, sprinkle with minced garlic, and place back in the oven. Bake until crispy and golden brown, about 15 minutes.
Sprinkle with salt, pepper, and parsley, and try not to eat the whole pan by yourself.