Thursday, March 6, 2014

Available 2 bed 2 bath

Attention Club Pacifica Residents!

 
Remember that you can get $500 if you refer someone you know to move into Club Pacifica!
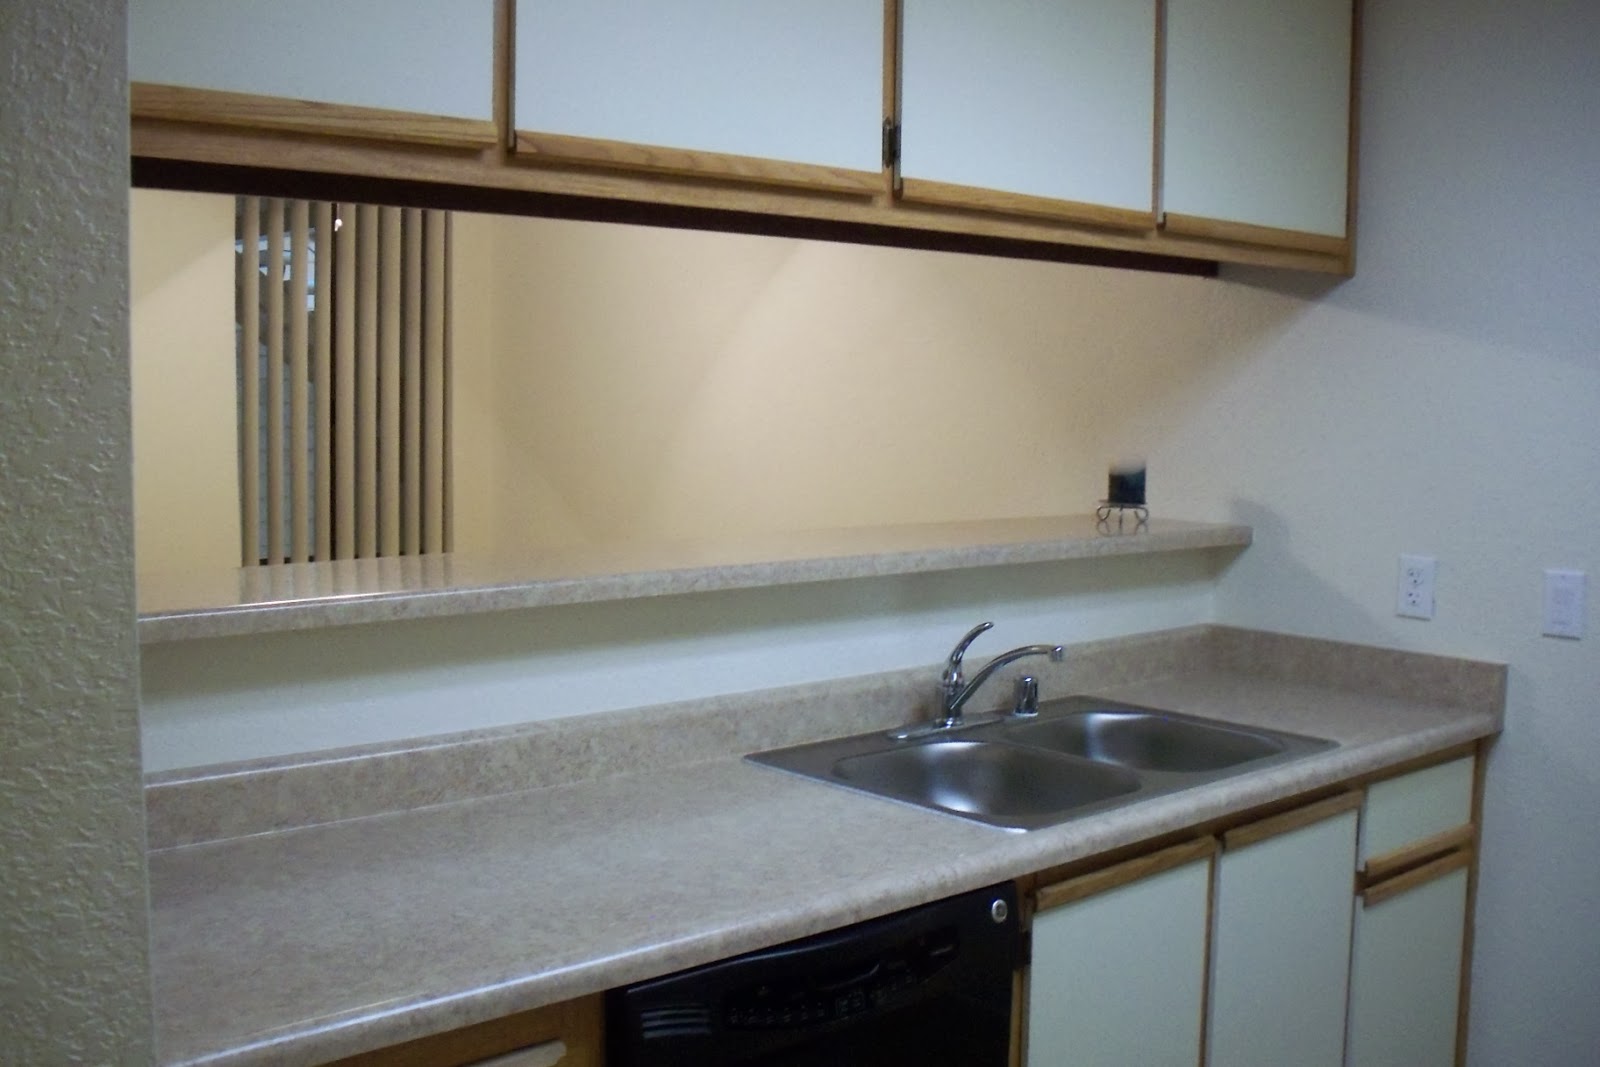
We now have available a two bedroom two bath apartment home located downstairs in a secluded location!  The monthly rent is $1510 per month. So spread the word to your friends, family and co-workers and become $500 richer!


Tuesday, February 25, 2014

Craft and Stay Clean

Do you like to craft or take on projects?  Cleaning and staying organized can be the worst part of starting a new craft or project.  We have some tips on how to keep your work station clean and organized while completing your latest creation. This can make the project less overwhelming and a more enjoyable experience.  You can learn more at apartment therapy.

Start with a clean surface.

Every project will have different requirements. You might need a small table for a quick paper project, or an enormous area to layout quilt pieces — either way it's a good idea to clear off your surface and wipe it down before getting out your supplies. It only takes a minute and ensures you won't set your materials down in a puddle
nullfrom your water glass, breakfast crumbs, stray threads, or any of the dozens of household perils for craft supplies.

Gather all of your materials and tools before beginning your project.

This is a common cooking tip that applies to crafting as well. By gathering everything together you're checking to be sure you have all of the necessary supplies, and preventing mess-making mid-craft mad shuffles through the bins, baskets, closets and drawers that house your supplies. Now, I will not be so obnoxious as to say that having all of your supplies stored in an organized manner is a tip for staying organized while crafting, but I will say that if the ribbon you need is tucked in a drawer with other ribbons instead of tangled around eight half-wound skeins of yarn studded with hazardous fabric shears and knitting needles, it will be easier to get started on the right foot.

Corral small items.

Anything tiny that comes in multiples should be corralled into bowls or other small containers. Things like beads, sequins, scrapbook eyelets, and screws have a tendency to roll off everywhere and then be impossible to find. I occasionally realize I must have dropped some beads when I hear my vacuum struggling near my project table. Of course, I feel I have to mention glitter. By all means corral it in a container of some kind, but if you're working with glitter my best advice is to learn to love glitter, because you will be living with it until the end of time. I have been married three and a half years and I still find glitter from the place cards at my wedding, and I've moved twice since then!

Place a scrap receptacle right at your feet.

Any sort of basket or bin to drop scraps into as you go will help keep things tidy. I like to put all of my sewing or paper scraps into my bin while I'm crafting, then go through at the end to see if I have any scraps large enough to keep. If you're working with glue, paint, or other messy/sticky items, it's a good idea to have an actual trash can nearby to throw away anything that can't be salvaged.

Clean up immediately upon finishing your project.

This is where I get into trouble. It's important to immediately put away all of your leftover supplies and tools. That way everything is back where it belongs when you want to start your next project. It's amazing how cyclical organization is! Once everything is put away you can wipe down your surfaces again. If anything has spilled, or you've marked your surface, it will never be easier to clean than when it's fresh. You can even take care of a fair amount of the aforementioned glitter mess with a damp towel.

Following these tips should help you have a tidy crafting experience, and set you up to start your next fun project!

Monday, February 17, 2014

Comfort Food From Around the World


Do you enjoy comfort food?  Here are some great recipes from around the world.  Each of these recipes is considered a "comfort food" in their country.  You can learn more at The Kitchn.

Pin_it_button
Authentic Spaghetti alla Carbonara
Pin_it_button
How to Make Baklava

Wednesday, February 12, 2014

DIY Valentine's Day Gifts

 Are you looking for a gift for your special guy this Friday?   These are some great DIY gifts that will not break the bank.  Keep reading and you can learn more here.


1. DIY Sharpie Mug - For the always-working-late, coffee-obsessed guy
Want him to stay sharp in the morning? Make your own coffee mug by drawing or writing some personal messages on it with a Sharpie marker. It's an easy, tailored gift that he can actually use. You can buy your own mug and Sharpie or get a DIY mug gift package at Starbucks. Here's a YouTube tutorial:

2. DIY Skinny Tie - For the business-first, suit-up-like-Barney-Stinson guy
Suit up!
Ties are one of the top picks in terms of gifts for men, but instead of spending hundreds of dollars on a nice tie, why not make one for him? You can use any kind of fabric you want, just be creative. A guy can never have too many ties--just as girls can never have too many shoes. 
DIY MEN'S SKINNY TIE

3. DIY Meal - For the food-loving, on-a-budget guy
Suit up! (dailymeanwhile/tumblr)The first thing everyone thinks of when it comes to Valentine's Day is having a good meal at a nice restaurant, which is usually expensive. Instead, why not buy a couple of candles and placemats and cook him a meal instead? Dinner can be just as nice at home, especially if you cook his favorite dishes. Here's a link to some Valentine's Day recipes, but there are thousands of other ideas out there for making a special V-Day feast.
20 LOVEY DOVEY DINNERS
One for you and one for him.
 
4. DIY Laptop/iPad Case - For the tech-savy, slightly hipster guy
One for you and one for him. (etsyfindoftheday/tumblr)Many people have Macbooks and iPads these days, but you can make his stand out with a personalized laptop or iPad sleeve. Be creative by adding things that only you two would understand. From leather to tweed cases, here are 20 simple tutorials on making a laptop or iPad sleeve just for you and yours. 
20 DIY LAPTOP/IPAD SLEEV PROJECTS
5. DIY Kiss Flip book - For the romantic, photo-loving guy 
Time to go old-school this time
Time to go old-school this time (rain--in-july/tumblr)Whether he's a hopeless romantic or a down-to-earth practical kind of guy, he will definitely appreciate this cute little idea. Between Facebook, Twitter, Instagram and Vine, you can easily find photos and videos of your other half, but this old-school method of stop-motion will create a more touching action sequence than any app could. Here's an easy tutorial on making a Kiss Flip book, which you can customize to your liking.

Tuesday, February 4, 2014

Side Dish from Your Childhood

Are you craving that familiar food from your childhood? You can have grown up tater-tots that do not look like they come from a school cafeteria?  Here is a great recipe from The Kitchn.


Grown Up Tater-Tots


Serves 2 to 3
1 pound small potatoes, like baby Yukon Golds or fingerlings
4 tablespoons olive oil
2 cloves garlic, minced
Salt and freshly ground black pepper, to taste
Italian parsley, finely chopped

Preheat the oven to 350°F. Thoroughly scrub the potatoes and arrange them on a parchment-lined baking sheet. Bake for 20 minutes or until they are tender enough to pierce with a fork, but not browned. Let the potatoes rest for 10 minutes or until they are cool enough to handle.
Turn the oven up to 450°F. Using the bottom of a plate, a sturdy rocks glass, or measuring cup, smash the potatoes with firm, downward pressure. Squish each potato to about 3/4-inch thick. They will crack and split, but they should, for the most part, stay in one piece.
Brush or drizzle generously with olive oil, sprinkle with minced garlic, and place back in the oven. Bake until crispy and golden brown, about 15 minutes.
Sprinkle with salt, pepper, and parsley, and try not to eat the whole pan by yourself.

Wednesday, January 29, 2014

A New Look For Your Home

Are you getting bored with your current look in your bedroom?  There are ways to change up your bedroom without spending tons of money.  A few simple changes can make it feel like you have a whole new bedroom.  You can learn more at apartment therapy.

1. Clean your sheets. Nestling in between freshly laundered sheets is probably the easiest and cheapest way to feel like you're in a new room. If you're feeling fancy, try adding some homemade linen spray.
2. Make your bed. While I have a hard time keeping my bedroom as neat as I'd like, I always make my bed. Even if there's some stuff on the floor and your hamper's full of dirty laundry, a made bed gives a bedroom a sense of order.
3. Clear off or minimize clutter on dresser tops. Lots of little things tend to accumulate on my nightstand (glasses and mugs, mostly) and my husband's dresser (e.g., baseball hats and receipts). A quick sweep can make your room instantly better organized and cleaner looking.
4. Bring in flowers or a plant. The January Cure teaches all of us how refreshing it is to have some fresh greenery. Drop a few dollars at the grocery store or, if you have a sunny spot, relocate one of the succulents you have sunbathing in another room. At least in my world, greenery is happiness.
5. Rearrange artwork. Switching up what hangs where is a free way to change how your room looks and, in my experience, is a good way to get started thinking creatively.

Wednesday, January 22, 2014

Eliminate the Clutter in Your Apartment

Does your apartment get cluttered throughout the week?  Here are some great tips on how to slowly eliminate the clutter that builds up throughout the week.  These tips will help your apartment stay cleaner, and it will help you feel less stressed when you come home.   You can learn more at apartment therapy.

Designated Outbox: Set up a permanent basket, box, or bag by your front door to toss things that need to go. Make it part of your decor so that it's part of your daily life and doesn't just look like a messy cardboard chore lurking in the corner, sending accusing looks at you. Try emptying it once a week or at least twice a month.
Clean As You Cook: Somehow a messy kitchen with a pile of dishes is always the first stop on the ride on the messy train. Never go to bed with a sink full of dishes. Waking up to dirty dishes just sets you starting your day off wrong. Also, try to clean up as you cook so that when dinner is done you don't turn around to more work and can end your night on a good note.
Sort Mail Immediately: I am guilty as charged when it comes to piles of mail in various places that "I'll get to later." My new workflow is: pick up mail; open it over the recycle bin; put bills in a designated bill cubby; and feel good while doing it.
Tidy Up 10 Minutes a Day: You can split this up into two five-minute chunks or a full ten. Quickly shuffle through your house (preferably at the end of the day) and put away all those little things that you took out, opened, or tossed on the couch throughout the day. This way you can reset your home each evening and start fresh each morning.
Refocus Your Energy: A long time ago I heard someone say, 'it takes just as much energy to be messy and it does to be clean" and it always stuck with me. It makes total sense: when you're messy you are just delaying the energy it will take to clean it up instead of doing it immediately. I find that, when I clean as I go, I'm much happier and rest so much better without 'to do's' weighing on my mind, or seeing guilt-ridden piles of stuff.

Tuesday, January 14, 2014

DIY Organization

Are you looking for a new organizational system for the new year?  Buzzfeed has a list of 50 Clever DIY Organizational Ideas.  You can look below and check out Buzzfeed for the complete list.


1. Tea Shelf

Tea Shelf
Organize all your teas (or coffees or spices or what-have-yous) in this prettified champagne box by Sarah from Look What I Made.
Materials: an old wine or champagne box (you can get it at wine stores or even some delis), two pieces of the lid of the box (you’ll get it in pieces anyway since it breaks when opened), four screws, decorative paper (old wrappig paper will do the trick), and a screwdriver.

1. Take the box and fit the paper in the back. Just fold the edges in to get the right size. No need to glue it- adding the shelves will secure it in place.

2. Take the pieces of the lid and fit them in where you want the shelf to go. Screw them to the sides.
3. Once you have the pieces of the lid set and steady, the little shelf is finished.

2. Book Letter Holder

Book Letter Holder
Don’t let your mail just pile up on the counter this year. Use this tutorial by Renee from Bulb to Blossom to turn an old book into an elegant letter holder.
Materials: a book (a smaller hardcover works nicely), craft glue, a sponge brush, a ruler, and a utility knife.

1. First, after separating the book into equal sections, apply glue to the inside of the seam.

2. Use the sponge brush to spread the glue evenly along the seam.
3. Roll the first section of the book inward and press it into the seam, and hold in place.
4. Continue this process for the remaining sections.
5. After the glue has dried, use your ruler and utility knife to score the cover of several times, removing the excess. Do this for the front and back cover.

3. Address Book

Address Book
You meant to send out those thank you cards, mail that New Year letter, and just keep in touch in general. However when the “daunting” task of writing that letter, and penning 30+ addresses… sometimes best of intentions is as far as it goes. So create this zero effort address mailing book by Ursula from Homemade by Carmona that takes the scary out of the task! Perfect for Christmas cards, paying bills, sending out party invitations, or just your everyday letter.

Materials: binder, plastic divider pockets and/or sheet protectors, variety of address labels, and stationery materials (cards, envelopes, paper, stamps, stickers, and ribbon).

1. Create address labels. Using the template instructions included with the labels, type up addresses by category. Try categories such as His Side of the Family, Her Side of the Family, Friends of the Family, Business Associates, Church Friends, even Monthly Bills, etc. Don’t forget to create return address labels.
2. Print an address template on paper rather than directly onto labels. Addresses may change over time, and it is better to keep a paper template you can copy off of when you are ready to print your actual labels. Make any necessary changes on your computer and print up a new paper template rather than waste pre-printed labels. (The only exception is return address labels.)
3. Organize and stock the binder. Use pocket dividers or sheet protectors to organize address templates, a variety of label styles (same size), cute stationery, stickers, stamps, etc.
4. Use your address book often!! When it is time to plan that party or send those thank you notes, pull the appropriate address category, print your labels, adhere, and send.

4. Magnet Bowls

Magnet Bowls
Simply paint some magnetic bowls and use them to store all your metal necessities, such as pins, paper clips, jewelry, nuts and bolts. This simple tutorial shows you how.

5. Cubby Shelf Organizer

Cubby Shelf Organizer
This post shows you how to secure empty tape rolls to a glitter-covered tape roll to create a storage solution of jewelry and other odds and ends.

6. Screwdriver Coat Rack

Screwdriver Coat Rack
Turn painted screw drivers into the handles of a modern DIY coat hanger.

7. Six-pack Craft Caddy

Six-pack Craft Caddy
Easiest DIY ever- use six-pack beer box to store your craft supplies, such as knitting needles, tape measures, and yarn. This blog had the bright idea.

8. Makeup Brush Storage

Makeup Brush Storage
This blogger shows you how to weave elastic through a sushi mat to make a nifty makeup brush storage solution.

9. Shoe Ladder

Shoe Ladder
Paint a wooden ladder and you’ve got yourself a new shoe rack! As seen here.

10. Wire and Hanging Spice Storage

Wire and Hanging Spice Storage
Stacking spices in a cupboard just doesn’t work. But you can easily (and cheaply) make a pretty and practical spice display with small glass bottles, wire, a white Sharpie, and this tutorial.

11. Peg Board Yarn Holder

Peg Board Yarn Holder
Are you a knitter or crocheter? A peg board make for easy and artful yarn storage. Check out this post for details.

12. Color Block Mason Jars

Color Block Mason Jars
Chalkboard paint and mason jars won’t be going out of style in January 2014. Try this colorful variation to decorate your office odds and ends, as done here.

13. Etched Glass Kitchen Containers

Etched Glass Kitchen Containers
But if you’re over the whole chalkboard thing, try etched glass instead. These instructions explain how to make glass kitchen containers for keeping your pantry sorted.

14. Wrapping Paper Holder

Wrapping Paper Holder
Wrapping paper in disarray after the holidays? Use an wooden stool to organize it, as done here.

15. Earring Rack

Earring Rack
Simply secure chicken wire to the interior of an empty frame to make a lovely and functional earring rack. This tutorial shows you how.

16. Salt Dough Magnets

Salt Dough Magnets
Organize your life with these handy little magnets made from flour, salt, and water. Use them to keep track of the dishes, your to-do lists, etc. Check out this recipe.

17. Colorful Hook Hanger

Colorful Hook Hanger
Find a precut wooden base and screw in a jumble of differently colored perfect hooks. Store scarves, purses, keys, etc. by the door. Here are the details.

18. Scarf Hanger

Scarf Hanger
Use a sturdy wooden hanger and shower curtain rings to organize all your scarves. Follow this simple tutorial.

19. Cord Organizer

Cord Organizer
Decorate some empty toilet paper rolls with washi tape and use them keep your cords untangled, as done here.

20. Knob Necklace Organizer

Knob Necklace Organizer
Screw a variety of door knobs onto a wooden board to make this necklace organizer.

21. Pen Holder

Pen Holder
Simply stick a bunch of empty toilet paper rolls inside a decorated shoe box to keep your pen stash neatly organized. As done here.

22. Kitchen Shutter Door Organizer

Kitchen Shutter Door Organizer
Spray paint an old shutter door, and use it to hang your kitchen goods. Check out these directions.

Tuesday, January 7, 2014

Creative Frozen Dinners

Do you want to make meals ahead of time for the week?  Check out these great frozen dinners that will be great for you and your family throughout the week.  You can learn more at The Kitchn.

 
Folks’ thoughts turn to casseroles when they think of frozen meals. Don’t get me wrong; I love a good casserole. But you do your freezer and yourself a disservice if you limit your options to lasagnas, enchiladas, and noodle bakes, as good as they may be.

With six children ranging in age, personality, and culinary maturity, I’ve found that I need to think outside the 9x13-inch baking dish if I’m going to put a meal on the table that we’ll all enjoy. Several years ago I hit on the idea of freezing meal components, like cooked taco meat, as well as complete dinner kits to help me save time in the kitchen as well as benefit from bulk purchases of proteins I found on sale.

Homemade, frozen dinner kits can be the perfect solution to those nights when you don’t have time for extensive prep work, but want to avoid the drive-thru lane. Think of some of your favorites like tacos, fajitas, chicken stir-fry, even homemade pizza. Yes, you can make dinner kits of all these great suppers, and more if you think about your favorite recipes in a new way.

Analyze Your Dinner Repertoire: 3 Tips

Ask yourself these questions as you consider your family's favorite meals.
  • What items can be cooked in advance? Taco meat, shredded chicken, pork, or beef, sautéed or grilled meats, cooked rice, and roasted vegetables can all be prepared ahead of time and used later.
  • What items can be prepped, sliced, diced, chopped, or shredded to use later? Think about sliced peppers, mushrooms, and onions; shredded cheese; pizza dough; marinated meats; spice rubs and sauces.
  • What commercial items are good to keep on hand and at the ready? You can easily slip a bag of tortillas or a package of pitas into the freezer next to the other components of the meal. In fact, when you combine all the items into one larger, zip-top freezer bag, you’ll have everything all ready to go with one quick reach into the freezer.

6 Favorite Dinner Kits to Freeze

I’ve made frozen meal kits with our family’s favorite meals. Consider stocking these kits in your freezer:
  1. Homemade Pizza – Package balls of dough (such as this dough), shredded cheese, and sauce along with other favorite toppings individually. Place all individual packages into larger zip-top freezer bags in the freezer.
  2. Fajitas – Package marinated chicken or beef strips, sliced fajita vegetables, and small flour tortillas in individual bags. Place all bags into a larger zip-top freezer bag and stash in the freezer.
  3. Tacos – Individually package cooked taco meat, shredded cheese, and tortillas. Combine in a larger zip-top freezer bag in the freezer.
  4. Stir-fry – Prepare smaller bags of sliced meat, chopped vegetables, cooked rice, and stirfry sauce. Store them all in a larger zip-top freezer bag in the freezer. (See The Kitchn's guide to making freezer stir-fry meals.)
  5. Chicken and Rice Bake – Assemble individual packages of marinated chicken, rice and spice mix, and chopped vegetables. Store together in a larger zip-top freezer bag in the freezer. (Get a recipe for Chicken and Wild Rice Bake.)
  6. Meatballs and Mashed Potatoes – Prepare a bulk batch of meatballs, gravy, and mashed potatoes. Store the three components separately in meal-size portions and freeze. (Get a recipe for Turkey Meatballs or Classic Veal Meatballs.)
There’s really no end to the possibilities of meal kits you can prepare for freezing. Just think about what you can do in advance and do that. If you’ve got time to make several batches of hamburger patties, you can save time later when it’s time to eat. Make a big batch of homemade BBQ sauce and precook the bacon. Store the frozen patties in their own bag, next to a container or sauce, a packet of bacon, a small bag of cheese, and a package of burger buns. Southwest Bacon Cheeseburgers will come together in a jiffy.